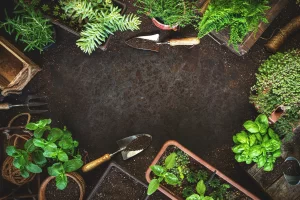
Propagating plants is one of the best ways to expand your garden without spending extra money. Whether you want to grow flowers, herbs, succulents, or trees, learning how to make new plants from existing ones allows you to multiply your garden naturally.
In this guide, you’ll learn the best propagation methods, which plants work best for each technique, and step-by-step instructions to help you successfully create healthy plant cuttings and seedlings.
1. Why Propagate Plants?
Propagating plants is not only cost-effective but also rewarding. Here’s why gardeners love plant propagation:
✔ Saves money – Instead of buying new plants, you can grow your own.
✔ Preserves rare and favorite plants – Some varieties are hard to find in stores.
✔ Strengthens your garden – New plants adapt faster when grown in the same environment.
✔ Speeds up plant production – Many plants grow faster from cuttings than from seeds.
🌟 Tip: Some plants propagate easily from cuttings (like mint and rosemary), while others grow better from seeds or division (like lavender and hostas).
2. Best Plant Propagation Methods
There are four main ways to propagate plants:
🌱 1. Propagation by Cuttings (Best for Herbs, Flowers, and Shrubs)
How It Works:
Cut a section of a healthy plant and place it in water or soil until roots develop.
Best Plants for Cutting Propagation:
✔ Herbs – Basil, mint, rosemary, thyme
✔ Flowers – Geraniums, roses, petunias
✔ Shrubs – Hydrangeas, lavender, pothos
How to Take a Cutting:
- Use clean pruning shears to cut a 4-6 inch section of a healthy stem.
- Remove the lower leaves, leaving 2-3 at the top.
- Dip the cut end in rooting hormone (optional but speeds up rooting).
- Place the cutting in moist soil or water.
- Keep it in indirect light and mist regularly.
🚫 Avoid direct sunlight at first—young cuttings can dry out quickly.
🌟 Tip: Change the water every 3-4 days if rooting in water to prevent bacteria buildup.
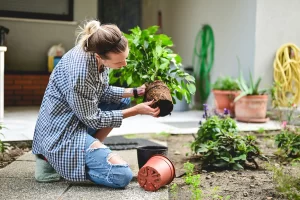
🌿 2. Propagation by Division (Best for Perennials and Clumping Plants)
How It Works:
Plants with multiple stems or bulbs can be split into smaller sections and replanted.
Best Plants for Division:
✔ Perennials – Hostas, ferns, daylilies
✔ Houseplants – Snake plants, peace lilies
✔ Bulbous plants – Tulips, daffodils, onions
How to Divide a Plant:
- Carefully dig up the plant, keeping the roots intact.
- Gently separate the root clumps using your hands or a knife.
- Replant each section in fresh soil.
- Water thoroughly and provide shade for a few days.
🚫 Don’t divide plants during extreme heat or cold—spring and fall are the best times.
🌟 Tip: When dividing bulbs, make sure each section has at least one growth point.
🌾 3. Propagation by Layering (Best for Vines and Climbing Plants)
How It Works:
A stem is bent down into the soil and left to root before being cut from the parent plant.
Best Plants for Layering:
✔ Vining plants – Jasmine, ivy, pothos
✔ Berry bushes – Strawberries, raspberries
✔ Ground covers – Creeping thyme, mint
How to Propagate by Layering:
- Find a healthy, flexible stem and bend it towards the soil.
- Remove the leaves from the buried section.
- Make a small cut on the underside of the stem to promote rooting.
- Secure the stem to the soil with a small rock or U-shaped pin.
- Keep the soil moist and wait 3-6 weeks for roots to develop.
- Once rooted, cut the stem from the parent plant and transplant it.
🌟 Tip: For air layering, wrap a moist sphagnum moss ball around a branch and cover it with plastic wrap until roots form.
🌾 4. Propagation by Seeds (Best for Vegetables and Wildflowers)
How It Works:
Seeds are collected, dried, and germinated in soil or seed trays.
Best Plants for Seed Propagation:
✔ Vegetables – Tomatoes, peppers, lettuce
✔ Flowers – Marigolds, zinnias, sunflowers
✔ Trees – Oak, maple, avocado
How to Start Seeds:
- Collect seeds from mature plants and let them dry.
- Fill seed trays with light, well-draining soil.
- Plant seeds at the recommended depth.
- Water gently and cover with a plastic dome or bag to retain moisture.
- Place in a warm, bright area (near a window or under grow lights).
- Once seedlings develop 2-3 true leaves, transplant them into larger pots or the garden.
🚫 Don’t overwater seeds—they can rot before germinating.
🌟 Tip: For fast germination, soak seeds in warm water overnight before planting.
3. Common Propagation Problems and Solutions
Even with the best care, plant propagation can sometimes go wrong. Here’s how to fix common issues:
| Problem | Cause | Solution |
|---|---|---|
| Cuttings are wilting | Too much sun, not enough moisture | Move to indirect light, mist daily |
| No roots forming | Cutting too old, needs more humidity | Try younger stems, cover with a plastic bag |
| Seedlings dying (damping off) | Fungal infection from overwatering | Improve airflow, use sterile soil |
| Leaves turning yellow | Overwatering or poor drainage | Reduce watering, improve soil drainage |
🌟 Tip: Keep propagated plants in a humid environment to increase survival rates.
4. Best Time to Propagate Plants
🌱 Spring & Early Summer – Best for most cuttings and seed propagation.
🍂 Fall – Ideal for division of perennials and transplanting rooted cuttings.
❄ Winter – Best for indoor propagation using grow lights.
🌟 Tip: Avoid propagating plants during extreme temperatures (very hot summers or freezing winters).
5. Caring for Newly Propagated Plants
Once your cuttings, divisions, or seedlings have established roots, they need gentle care to thrive.
✔ Keep soil consistently moist (but not soggy).
✔ Provide indirect sunlight for the first few weeks.
✔ Harden off seedlings by gradually introducing them to outdoor conditions.
✔ Avoid fertilizing too soon—wait until plants have strong roots.
🌟 Tip: If transplanting cuttings outdoors, do it on a cloudy day or in the evening to prevent stress.
Final Thoughts
Propagating plants is a fun, easy, and budget-friendly way to grow your garden. Whether you’re using cuttings, division, layering, or seeds, following the right steps will increase your success rate.
🌿 Start propagating your favorite plants today and enjoy a thriving, self-sustaining garden! 🌿