Peas are easy-to-grow, nutrient-rich, and highly productive cool-season crops. Whether you prefer snap peas, snow peas, or shelling peas, they thrive with cool temperatures, proper support, and consistent watering.
In this guide, you’ll learn how to plant, care for, and harvest peas to enjoy a fresh, homegrown supply throughout the season.
1. Choosing the Right Pea Variety
There are three main types of peas, each with unique flavors and uses.
Best Pea Varieties for Home Gardens
🌿 Snap Peas (Edible Pods, Crisp & Sweet)
✔ Sugar Snap – Juicy, crunchy, highly productive.
✔ Super Sugar Snap – Disease-resistant, larger pods.
✔ Sugar Ann – Early-maturing, perfect for containers.
🌿 Snow Peas (Flat Pods, Mild Flavor)
✔ Oregon Sugar Pod – Large, tender pods.
✔ Dwarf Grey Sugar – Compact, great for small spaces.
✔ Mammoth Melting Sugar – Prolific vines with large pods.
🌿 Shelling Peas (Sweet, Best for Cooking)
✔ Green Arrow – High-yielding, easy to shell.
✔ Little Marvel – Small, bush variety, great for containers.
✔ Lincoln – Heat-tolerant, excellent for freezing.
🌟 Tip: If you love eating fresh peas, grow snap or snow peas. For soups and storage, grow shelling peas.
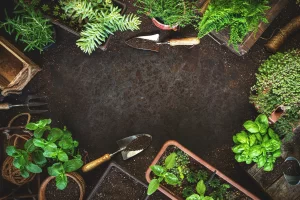
2. Preparing the Soil for Peas
Peas grow best in light, well-draining soil with moderate fertility.
Ideal Soil Conditions for Peas
✔ pH between 6.0 and 7.5 (neutral to slightly alkaline).
✔ Loamy, sandy soil to allow root growth.
✔ Well-draining but moisture-retentive to prevent drying out.
How to Improve Soil for Peas
✅ Mix in compost or aged manure before planting.
✅ Avoid high-nitrogen fertilizers (peas fix their own nitrogen).
✅ Use mulch (straw, leaves) to retain moisture and reduce weeds.
🌟 Tip: Peas benefit from crop rotation—don’t plant them in the same spot every year.
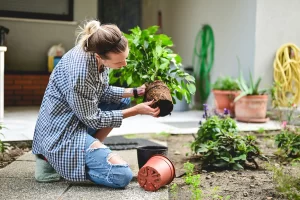
3. Planting Peas the Right Way
Peas thrive in cool weather and should be planted early in the season.
When to Plant Peas
- Spring planting: 4-6 weeks before the last frost (when soil reaches 45°F/7°C).
- Fall planting: 8-10 weeks before the first frost for a late harvest.
- Succession planting: Sow new seeds every 2-3 weeks for a continuous crop.
How to Plant Pea Seeds
✔ Soak seeds overnight to speed up germination.
✔ Sow seeds 1 inch deep and 2 inches apart in rows.
✔ Space rows 12-18 inches apart for airflow.
🚫 Avoid planting peas too late—they struggle in warm weather.
🌟 Tip: For containers, use a 10-inch deep pot and a small trellis for support.
4. Supporting Pea Plants
Most pea varieties require support to climb and produce higher yields.
Best Support Methods for Peas
🛠 Trellises – Use mesh netting or a vertical trellis for vining peas.
🛠 Fences – Attach pea vines to a garden fence.
🛠 Bamboo stakes – Great for bush peas or smaller varieties.
🌟 Tip: Bush peas (dwarf varieties) may not need support, but vining peas perform better with trellises.
5. Watering Peas Correctly
Peas need consistent moisture, but overwatering can cause root rot.
How Often to Water Peas
✔ Water deeply 2-3 times per week (1 inch per week).
✔ Keep soil moist but not soggy.
✔ Water at the base of plants to prevent fungal diseases.
🚫 Signs of Overwatering:
- Yellowing leaves
- Moldy stems
🚫 Signs of Underwatering:
- Wilting plants
- Small, tough peas
🌟 Tip: Use mulch around plants to retain moisture and keep roots cool.
6. Fertilizing Peas for Maximum Yield
Since peas fix nitrogen from the air, they don’t need much fertilizer.
Best Fertilizers for Peas
✔ Compost or aged manure – Enriches soil naturally.
✔ Low-nitrogen fertilizer (5-10-10) – Boosts flowering and pod production.
✔ Bone meal or rock phosphate – Encourages root growth.
When to Fertilize Peas
🟢 At planting: Mix compost into the soil.
🟢 During flowering: Apply phosphorus-rich fertilizer to boost pod formation.
🚫 Avoid too much nitrogen, as it leads to lush leaves but fewer peas.
7. Preventing Pea Pests and Diseases
Peas are generally low-maintenance, but they can be affected by pests and fungal diseases.
Common Pea Pests & Natural Solutions
| Pest | Symptoms | Solution |
|---|---|---|
| Aphids 🐜 | Sticky residue, curled leaves | Spray neem oil or soapy water |
| Pea Weevils | Holes in leaves, weak plants | Rotate crops, use floating row covers |
| Cutworms | Seedlings cut at soil level | Use cardboard collars around stems |
| Thrips | Silvery streaks on leaves | Encourage beneficial insects like ladybugs |
Common Pea Diseases & Prevention
| Disease | Symptoms | Prevention |
|---|---|---|
| Powdery Mildew | White powder on leaves | Improve airflow, water in the morning |
| Root Rot | Wilting, yellow leaves | Plant in well-draining soil, avoid overwatering |
| Fusarium Wilt | Stunted growth, yellow plants | Rotate crops, remove infected plants |
🌟 Tip: Companion plant peas with carrots, radishes, or mint to deter pests naturally.
8. Harvesting and Storing Peas
When to Harvest Peas
✔ Snap peas: Harvest when pods are plump but tender.
✔ Snow peas: Pick when pods are flat and full-sized.
✔ Shelling peas: Ready when pods are round and bright green.
How to Harvest Peas Properly
✔ Use two hands—one to hold the vine and the other to gently pull the pod.
✔ Harvest every 1-2 days to encourage more production.
✔ Pick peas in the morning for the best flavor.
🚫 Don’t wait too long—overripe peas become starchy and tough.
Storing Peas for Freshness
✔ Store fresh peas in the refrigerator for up to 5 days.
✔ Blanch and freeze peas for long-term storage (lasts 8-12 months).
✔ Dry peas for soups and stews.
🌟 Tip: The more you harvest, the more peas the plant produces!
Final Thoughts
Peas are one of the easiest and most rewarding cool-season crops. By choosing the right variety, providing support, watering properly, and preventing pests, you’ll enjoy sweet, homegrown peas throughout the season.
🌿 Start growing your own peas today and enjoy fresh, organic produce straight from your garden! 🌿